
Store Locator: an interactive map of your locations on your website
Who this is for: you have several locations in the same sphere (franchise, network, chain) and you want to show them on an interactive map built into your website, with search, directions and opening hours.
What you'll see: where the Store Locator is in the Settings, how to enable it, what its four tabs set (Design, Features, SEO, Embed) and how to put it on your website.
Overview
The Store Locator is a map of your locations that you embed in your website. Your visitors find the nearest point of sale on it, its opening hours and the way to get there.
It is set up once for the whole sphere: the page says so at the top, "These settings apply to the whole […] sphere, for each of its bubbles." You then choose which locations appear on the map.
To show it on your website, two ways:
- WordPress: the GMB Club Connect plugin and a shortcode to paste. The plugin also creates an SEO page for each location.
- Any other website: a small script to paste into your HTML code.
Step 1: enable the Store Locator
Click the gear icon at the top right of the header to open the Settings. In the left-hand menu, under Sphere, click Store Locator.
URL: /dashboard/parametres/store-locator
The Store Locator card ("Configure the interactive map of your locations") contains the Enable Store Locator switch. As long as it is off, the words "Store Locator disabled" are shown below it.

Turn the switch on. The Configuration block ("Design, features, SEO and embed") appears, with its four tabs: Design, Features, SEO and Embed. Click Configuration to collapse or expand the block.

Step 2: the design
The Design tab sets how the map looks. It is divided into sections that you expand one by one.
Colors: Primary color, Secondary color, Page background, Main text, Headings, Secondary text, Subtle text, Links, Card background, Card border and Separators. Each color is picked from the swatch or typed as a hexadecimal code (for example #1F3A5F).

Typography:
- Main font and Heading font, to choose from a list (for example Inter and Playfair Display);
- Base text size, H1 size and H2 size, set with a slider;
- Text weight and Heading weight (for example
400, Regularand700, Bold).
Cards and shapes:
- Card style: Shadow, Border or Flat;
- Card shadow: None, Subtle, Medium or Strong;
- with a slider: Card radius, Border radius, Section spacing, Max width (single page) and Map height.

Further down, the Card layout (widget) section sets how the location cards are laid out. The tab also covers the logo and a CSS field to go further. Click Save at the bottom of the tab.
Step 3: the features
The Features tab chooses what the visitor can do. Each row has its switch:
| Switch | What it adds to the map |
|---|---|
| Search bar | A field to search for a location. |
| Automatic geolocation | The visitor's position, to show them the nearby locations. |
| Filter by city | A filter by city. |
| Filter by category | A filter by location category. |
| Click to call | A button to call the location. |
| Directions link | A link to get directions. |
| Website link | A link to the location's website. |
| Show opening hours | The opening hours. |
| Show images/avatars | Each location's image. |

Scrolling down the tab:
- Opening hours display mode: Collapsible (default, the visitor clicks to expand), Today (only today's hours are visible) or Full (the table is always visible);
- Primary button: Directions, Website or Call. This button is larger and stands out from the others;
- Locations to include: the list of the sphere's bubbles, with their city. This is where you choose the ones that appear on the map;
- Max results: for example
50; - Default zoom: the zoom level when the map opens, with a slider;
- Default center: the Latitude and Longitude of the map's starting point. The Center on France link fills them in for you.

Click Save at the bottom of the tab.
Step 4: SEO
The SEO tab is only useful if your website runs on WordPress with the GMB Club Connect plugin: the box at the bottom says so, "These templates are used to generate SEO pages on your WordPress site."
| Field | What it is for |
|---|---|
| Index page title | The title of the page that lists all your locations, for example Find your Optique Martin optician. |
| Page slug | The end of this page's address, for example nos-etablissements. If you leave it empty, it is generated for you. |
| Page title template | The title of each location's page, for example {bulle_name} - optician in {city}. |
| Meta description template | The text Google may show under the title, for example {sphere_name} in {city}: eye exams, glasses and lenses. Opening hours and directions. |

The available variables are listed at the bottom of the tab: {bulle_name} (the location's name), {sphere_name} (the brand's name) and {city} (the city). Each page thus gets its own title, without you having to write it location by location.
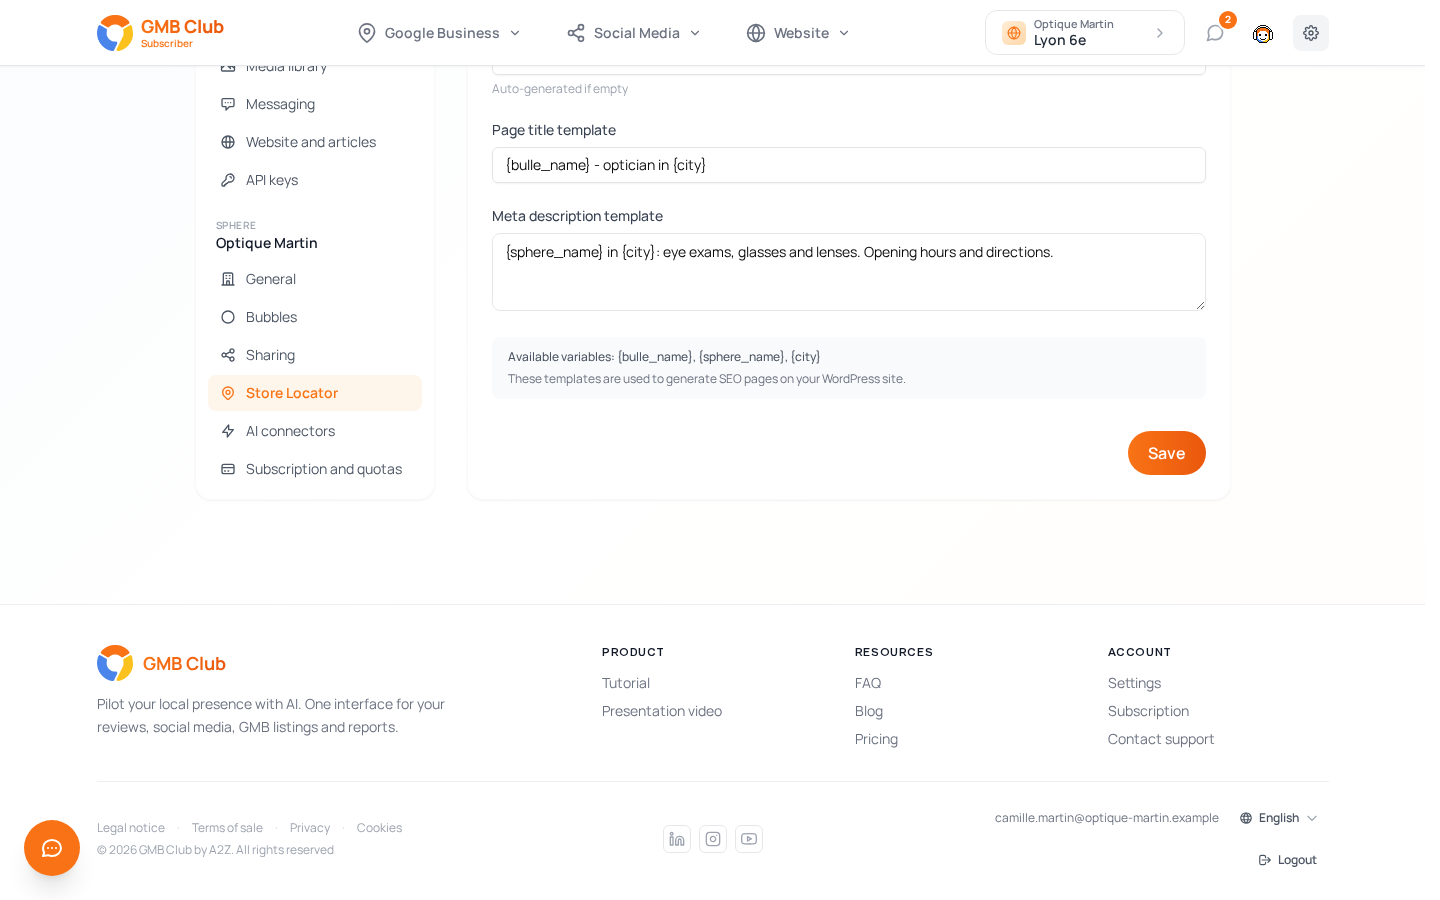
Click Save.
Step 5: embed the map on your website
The Embed tab gives you the code to put on your website. The code relies on a read-only key, which the tab creates in one click.
On WordPress: the GMB Club Connect plugin
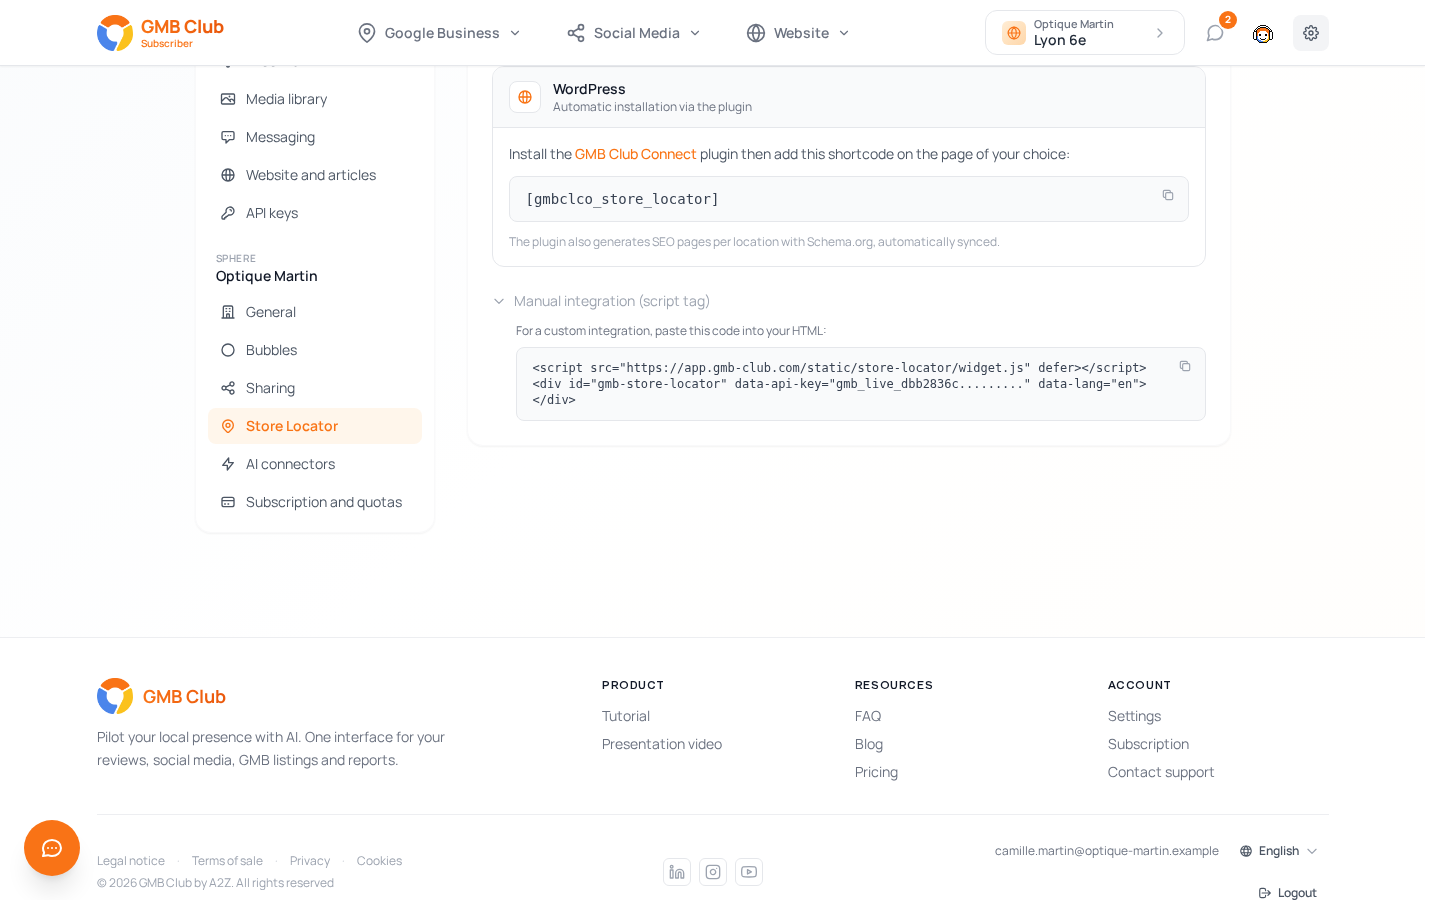
The WordPress block ("Automatic installation via the plugin") tells you: "Install the GMB Club Connect plugin then add this shortcode on the page of your choice".
[gmbclco_store_locator]
Copy the shortcode with the icon to the right of the code, then paste it into the page of your choice, for example an "Our stores" page. The plugin also generates SEO pages for each location (with Schema.org markup), automatically synced. That is what the settings of the SEO tab apply to.
It is the same plugin as for publishing your blog articles.

On another website: the script
Expand Manual integration (script tag). The text says: "For a custom integration, paste this code into your HTML". The code looks like this, with your key already filled in:
<script src="https://app.gmb-club.com/static/store-locator/widget.js" defer></script>
<div id="gmb-store-locator" data-api-key="gmb_live_…" data-lang="en"></div>
Copy it with the icon to the right of the block, then paste it where the map should appear on your page.
Recommended approach
- Open Settings › Store Locator and turn the switch on.
- In Design, reuse your website's colors and fonts, then Save.
- In Features, choose the useful buttons (directions, call, website), the Primary button and the Locations to include, then Save.
- On WordPress, fill in the SEO tab, then Save.
- In Embed, copy the shortcode or the script and paste it into a draft page of your website.
- Check that all your locations appear, that the opening hours are right and that the buttons work, then publish the page.
Common issues
A location doesn't appear on the map → In the Features tab, check that it is selected in Locations to include, and that Max results is high enough.
My changes don't show on my website → Design, Features and SEO each have their own Save button. Save the tab you changed before moving on to the next one, then reload your website's page.
The titles of my location pages don't change → The templates of the SEO tab only apply to the pages created by the GMB Club Connect WordPress plugin. With the script, they have no effect.
The map opens too far out or in the wrong place → Set the Default zoom and the Default center in Features. Center on France puts the starting point back on France.
I want my visitors to see all the opening hours at once → In Features, choose Full in Opening hours display mode.